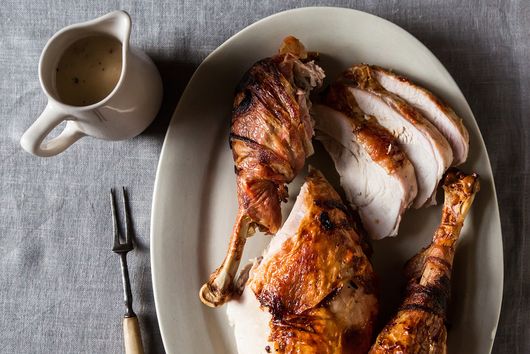
Russ Parsons' Dry-Brined Turkey (aka The Judy Bird)
★★★★★
PREP TIME
72 hours
COOK TIME
3 hours 15 minutes
SERVES
11 to 15
Ingredients
1
12- to 16-pound turkey (frozen is fine)
Instructions
- Wash the turkey inside and out, pat it dry, and weigh it. Measure 1 tablespoon of salt—we used Diamond Crystal kosher—into a bowl for every 5 pounds the turkey weighs (for a 15-pound turkey, you'd have 3 tablespoons). You can flavor the salt with herbs and spices if you like—try a pinch of smoked paprika and orange zest, bay leaf and thyme, or rosemary and lemon zest. Grind together with the salt in a spice grinder, small food processor, or mortar and pestle.
- Sprinkle the inside of the turkey lightly with salt. Place the turkey on its back and salt the skin of the breasts, concentrating the salt in the center, where the meat is thickest. You'll probably use a little more than a tablespoon.
- Turn the turkey on one side and sprinkle the entire side with salt, concentrating on the thigh. You should use a little less than a tablespoon. Flip the turkey over and do the same with the opposite side.
- Place the turkey in a 2 1/2–gallon sealable plastic bag, press out the air and seal tightly. (If you can't find a resealable bag this big, you can use a turkey oven bag, but be prepared for it to leak, or wrap the bird in a few layers of plastic wrap.) Place the turkey breast-side up in the refrigerator. Chill for 3 days, turning it onto its breast for the last day. Rub the salt around once a day if you remember. Liquid might collect in the bag as you go—this is normal!
- For the crispiest skin, the night before, remove the turkey from the bag. There should be no salt visible on the surface and the skin should be moist but not wet. Place the turkey breast-side up on a plate or rimmed baking sheet and refrigerate uncovered for at least 8 hours.
- On the day it is to be cooked, remove the turkey from the refrigerator and leave it at room temperature at least 1 hour (do not rinse—it's not needed, and rinsing will make the skin less crispy). Heat the oven to 425°F.
- Pat it dry one last time and baste with melted butter, if using. Feel free to tie the legs as shown in the photo if they're askew. (We don't recommend stuffing the bird as the meat will likely overcook before the stuffing reaches a safe 165°F, but if you're determined, please see the comments below for workarounds and advice.) Now you have two options: Flipping the bird midway through roasting (which will only help brown the bird more evenly) or not flipping—Russ Parsons himself realized after a few years that the meat will be juicy either way. If you're not flipping, place the turkey breast-side up on a roasting rack in a roasting pan; put it in the oven. If you are flipping, place it in the roasting rack breast-side down, put it in the oven and, after 30 minutes, remove the pan from the oven and carefully turn the turkey over so the breast is facing up (it's easiest to do this by hand, using kitchen towels or oven mitts).
- Whether you're flipping the bird or not, after 30 minutes total in the oven, reduce the oven temperature to 325°F, return the turkey to the oven and roast until a thermometer inserted in the deepest part of the thigh, but not touching the bone, reads 165°F, about 2 3/4 hours total roasting. Note that because a dry-brined turkey cooks more quickly than one that hasn't been brined, it's best to check the temperature early with this recipe—it may be done faster than you think!
- Remove the turkey from the oven, transfer it to a warm platter or carving board; tent loosely with foil. Let stand at least 30 minutes to let the juices redistribute through the meat. The drippings can sometimes turn out saltier than you may be used to, so be sure to taste them as you go and dilute with unsalted turkey or chicken stock as needed as you make the gravy. Carve and serve.


